Is your home really dry after a leak, or is moisture silently damaging your walls? Are you sure that puddle on the floor is the only thing you need to worry about? Many homeowners think setting up a few fans will do this, but that usually isn’t enough. If moisture isn’t dried properly, it can lead to mold, damaged materials, and expensive repairs soon. But what is the ideal air mover placement? Let’s find out!
Why Air Mover Placement Is So Important
Wet materials don’t dry well if the surrounding air is already full of moisture. Air movers keep air moving across wet surfaces so moisture can evaporate. When they are placed incorrectly, air can get trapped, leaving damp spots behind.
Proper airflow helps to:
- Speed up the drying process
- Lower the risk of mold growth
- Protect walls, floors, and structural materials
- Reduce overall restoration time

Air Mover Placement Checklist
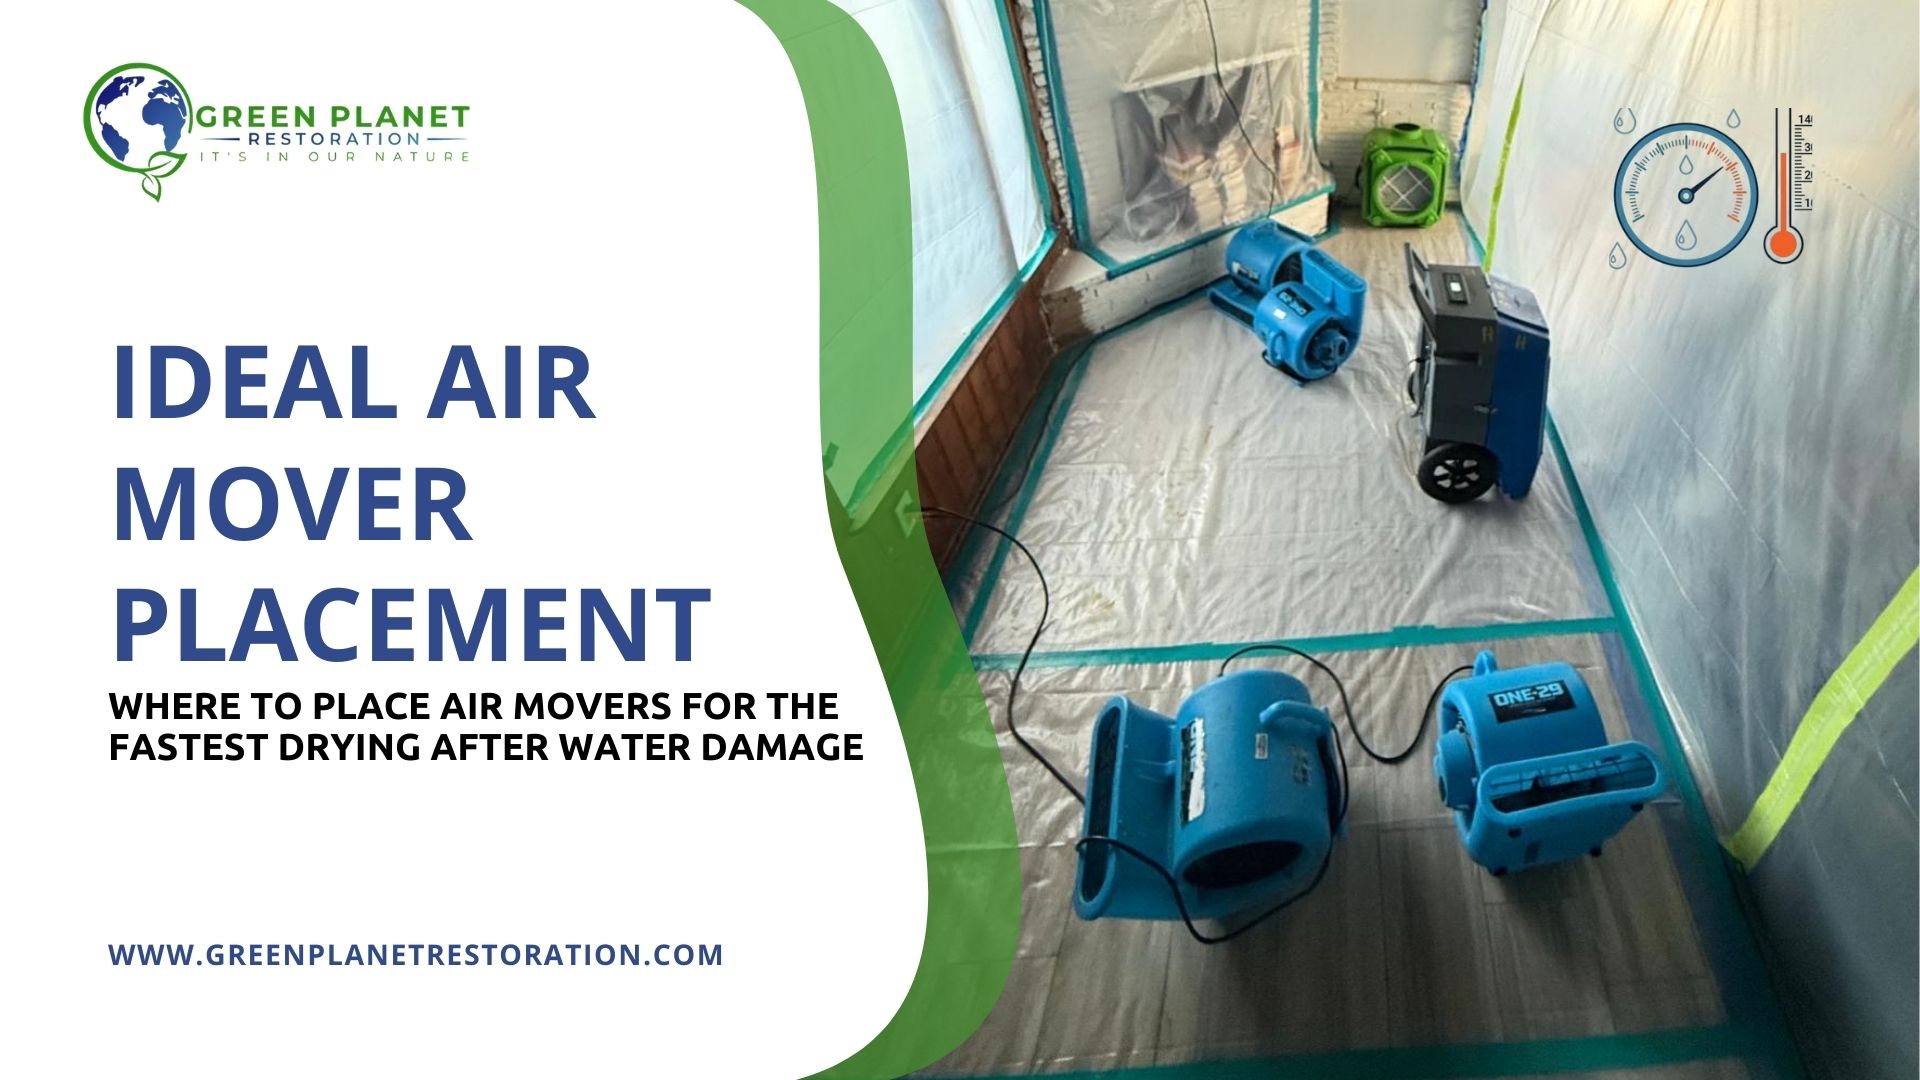
Knowing where air movers are placed is very important for how fast and how well a space dries up. When they are set up the right way and used with proper drying equipment, they remove moisture perfectly and protect your property. Our Air Mover Placement Checklist below explains how air movers should be positioned for faster drying.
Quick-Start Checklist for Air Mover Placement
- Target the wettest areas first, using a moisture meter.
- Angle fans at 45 degrees to wet surfaces.
- Create a circular airflow pattern around the room.
- Space units every 10-16 feet along wet walls.
- Don’t forget corners and tight spaces.
- Always run dehumidifiers alongside air movers.
1. Start With the Wettest Areas
The moisture meters are used by professional restoration teams to locate areas of trapped water. Air movers must be installed in the most humid areas.
For example:
- Carpet and padding: Keep the airflow underneath to dry the layers below.
- Walls: Keep the air low and angled slightly upward.
- Cabinets and built-ins: Use low-profile fans to reach tight or hidden spaces.
Always use moisture readings to know when something is truly dry, not just how it looks.
2. Angle Air Movers Toward Wet Surfaces
For wet walls, baseboards, and floors, air movers work best when placed at about a 45-degree angle. Because of this, air moves across the surface instead of blowing straight into it.
Angled airflow:
- Keeps moisture from settling on surfaces
- Helps break up damp air that clings to materials
- Allows drywall, wood, and subfloors to dry more evenly
Pointing a fan directly at a wall may feel logical, but it’s usually less effective than controlled airflow along the surface.
3. Keep Air Moving in One Direction (Circular Airflow Pattern)
Air movers should not be used in opposition to one another. Circularly placing them, clockwise or counterclockwise, keeps the air moving in the room.
Air should be pushed by each unit against the wall and to the next air mover. This setup:
- Prevents stagnant, humid air
- Helps moisture flow to dehumidifiers
- Boosts general drying capacity
Even drying requires a uniform flow of air throughout the area.
4. Space Air Movers Properly
As a general guideline, air movers should be placed every 10 to 16 feet along affected walls. The exact distance depends on how wet the materials are and how large the room is.
- Very wet areas may need the units closer together.
- Materials that absorb water easily usually need more airflow.
- Make sure the air from each fan slightly overlaps to avoid leaving damp spots.
Keep the air moving steadily, not randomly.
5. Pay Extra Attention to Corners and Tight Spaces

Corners remain wet longer since there is no movement of air through the corners. Water can be trapped behind framing, baseboards, and trim.
To help these areas dry faster:
- Position air movers diagonally so they reach both walls.
- In most wet corners, use two fans to improve airflow.
- Monitor moisture levels gradually to make sure the area is drying properly.
Leaving corners unattended can cause moisture to linger and lead to problems later.
6. Adjust Height and Direction When Needed
Moisture isn’t always near the floor. Tilt or raise air movers to reach upper walls, ceilings, or hard-to-reach areas.
- Angle units upward for upper walls and ceilings
- Stack or tilt air movers to reach higher areas
- Use low-profile air movers under cabinets, counters, or in crawlspaces.
This helps remove moisture from areas that are easy to miss but slow to dry.
7. Always Use Dehumidifiers Along With Air Movers
Air movers help in evaporating, but they are not useful in taking moisture out of the air. Without a dehumidifier, the air will remain wet and dry gradually.
Professional drying setups include LGR dehumidifiers, which:
- Pull moisture out of the air efficiently
- Keep humidity levels low
- Help dry materials like drywall, wood, and insulation
Humidity levels should be checked regularly and adjusted as drying continues.
Closing Remarks
The ideal air mover placement, after water damage, quickly and safely dries the place. When used correctly with professional dehumidifiers, air movers help stop mold, protect building materials and reduce restoration time.
If your home or business has experienced water damage, contact Green Planet Restoration for certified water damage restoration Del Mar CA. Our team uses modern drying methods and tools to restore your place securely, so you don’t have to worry.